More Plastic Recycling - Experimental Stuff
By Mike on Thursday, June 16, 2011, 20:08 - Permalink
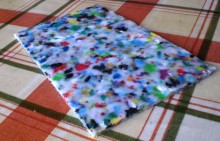 Spurred on by the resounding success of my project to mould a replacement kitchen knife handle from recycled HDPE, I thought it might be worth a little experimentation, to try to get a measure of the potential for small-scale, amateur remoulding of this material.
Starting Out
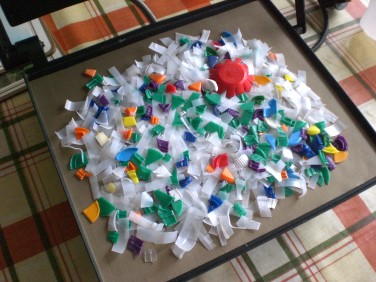 I started with a double-handful of shredded and chipped HDPE - the coloured bits are bottle top fragments, the white bits are milk containers snipped into shreds using scissors.
I spread them out on top of a piece of reusable nonstick cooking liner, in my sandwich toaster, then put another sheet of cooking liner on top and closed the lid.
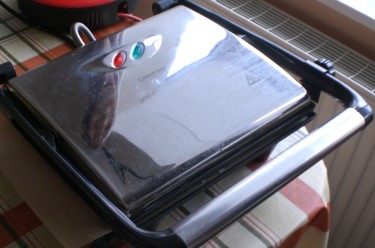 I started from cold, so the machine took a minute or so to come up to temperature.
I cooked the plastic shreds for about five minutes, applying a little pressure to the handle.
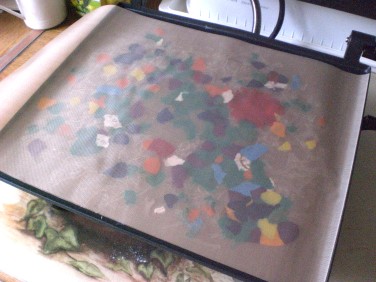 When I first opened the lid, there appeared to be a beautiful, flat, mosaic-like sheet of recycled HDPE.
However, this was still in a near-molten state - and as this material cools, it shrinks considerably. This caused it to buckle and ripple considerably - more on this later...
First Look
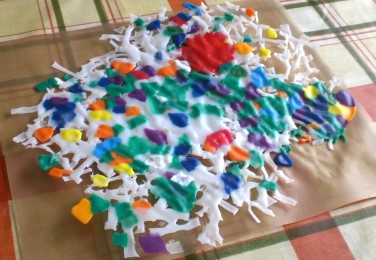 It's immediately apparent that the pieces have bonded very well - these aren't just compacted flakes of material any more - this is a fairly homogenous sheet of material - albeit versicoloured.
I subjected the material to a number of simple tests to find out more.
Bending
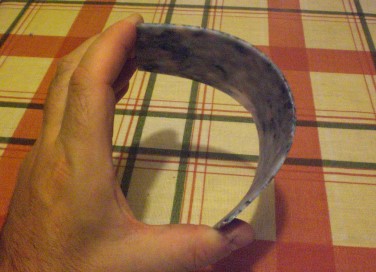
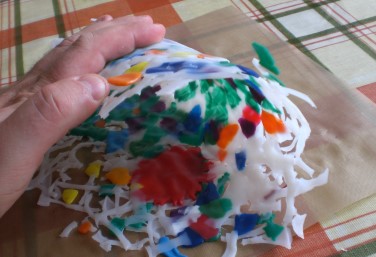 The sheet of recycled HDPE is about 2 to 4 mm thick - and it's surprisingly stiff - it bends without cracking or splitting and springs back to its original shape almost straight away.
It took considerable effort of the arm to keep it bent in the position shown here.
Homogeneity
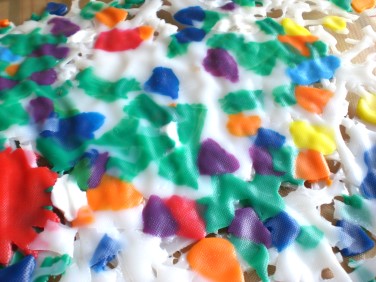 The pieces really have flowed into one another and bonded into a single material - some of this may be due to the pressure I applied to the press while it was cooking the material.
Impurities
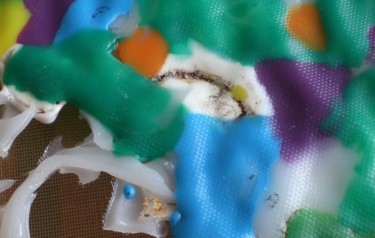 Some of the bottle-tops I used here were picked out of the gutter - and clearly, I didn't clean them adequately before recycling
This could be a problem, as an impurity such as this is probably a weak spot - and could fail under mechanical load, or may permit water through or into the material.
Flatness
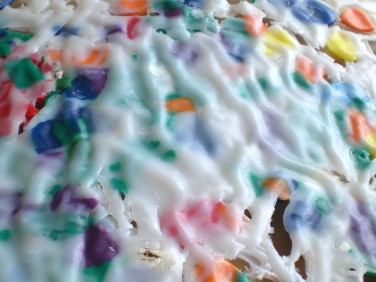 The material shrank by about 5 percent as it cooled, and this shrinkage caused buckling and rippling.
This could possibly be overcome by allowing it to cool more slowly by switching off the heated press and allowing the material to cool inside before removing it, but this would be a very slow production process.
I wonder if a sheet formed from pieces cut to smaller sizes might have performed more evenly in this regard.
Edges
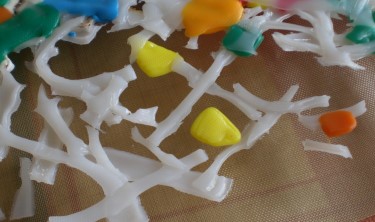 Even with the fairly neat heap I began with, the edges of my recycled material were ragged and lacy.
I had imagined this might make them easier to weld onto one another - and thus make large objects in patchwork fashion from many small sheets, but I'm just not sure about that - they were really very ragged and uneven - and the distortion from cooling was even more pronounced here.
It may be possible to form more regular sheets of material by constraining the stuff within a stencil-like hole cut in a sheet of metal - the thickness of the metal would also help to control the thickness of the finished sheet.
Cutting
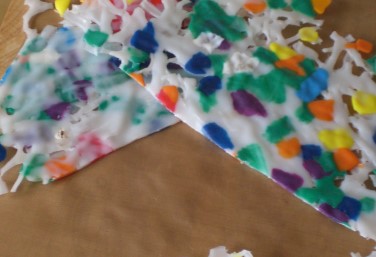 It was hard work, but with a pair of sturdy kitchen shears, I was able to cut my sheet of recycled HDPE in half.
It cut cleanly and without cracking or flaking.
Welding
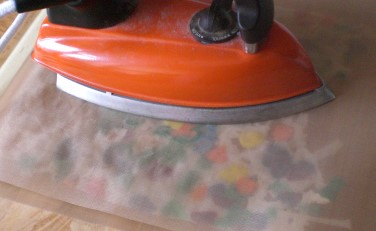 I tried welding the two halves of material back together, between two sheets of cooking liner, using a clothes iron on its hottest setting.
It was the lacy edges I overlapped to try to join here, but it didn't really work - the iron only applies heat from one side, so although the two pieces did soften and join, the joint wasn't strong or complete.
Hot-Air Forming
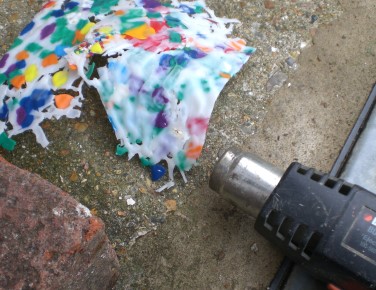 The material responded well to heat applied using a hot air paint stripper gun.
By judicious application of hot air, it was possible to encourage the sheet to accept a fold along a fairly predictable line.
It may also be possible to preheat the lower layer of a weld joint this way, then quickly apply the top one and iron it down... maybe...
Tentative Conclusions
Let me be quite honest and open here - I want to use this stuff to make a boat. Yes. A boat.
I'm well aware, of course, that there is an enormous technical gulf between making a three inch knife handle and making a 15 foot canoe - so this isn't something I'm going to attempt lightly - and I'm also aware that rotational hollow-forming is the normal mode of manufacture for large items of HDPE.
But if you know one thing about the Atomic Shrimp way, it should be this: Convention is not conventional here. I'm prepared to try doing things the wrong way, or the hard way, or a new way.
What Might Just Work
The idea needs some development still, but I really think it might be possible to melt HDPE granules into sheets, then weld those sheets togetther, patchwork-style, over some kind of form. The form needn't even be a complete one - it could be made adjustable so as to fully support the profile of the part being worked on (easier to envisage than describe - I'll flesh that out more if I ever get started on it).
Why It Might Not Work
There are millions of reasons why it might not work - quite literally - because a large item made from this recycled material would consist of millions of joined pieces - and each one of those joints (especially the big welds and seams) would be a potential point of failure.
For this reason, I might start smaller and try making, say, a bucket first. If I can make a bucket that holds water in, then it will start to support the notion that I can make a boat that holds water out...
Improved Process
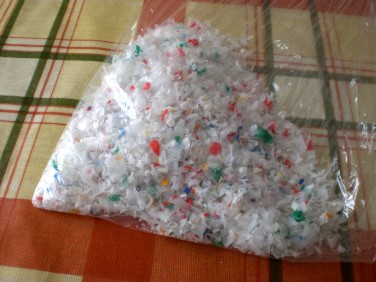 One thing that is already in my favour - on a whim, I tried running some coarse chunks of bottle and bottle top through my hand-cranked Spong mincer machine - intended for mincing meat and stuffing sausages.
I didn't really expect that it would work, but it did - HDPE is sufficiently slippery and compressible not to just jam the machine - and it comes out in quite small pieces - not uniformly small, but crucially, not big.
Experiment Two
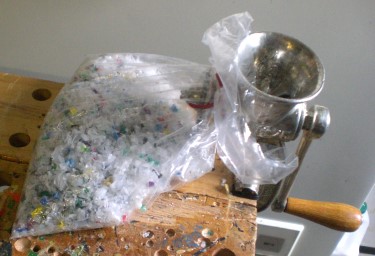 OK, here we go. I used my Spong mincer to grind up a few dozen assorted bottle caps and about five or six translucent milk bottles.
They still need cutting up roughly to feed into the mincer - and the mincing process itself is quite hard work - easier altogether than just snipping everything to its final sizes using the scissors, but I'll still need to find a different approach for larger scale recycling than this.
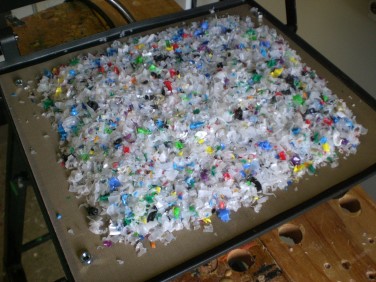 I spread about 175g of shredded plastic on the sandwich toaster hotplate.
At each corner, I placed a small metal nut - this is to ensure that the hotplates of the sandwich toaster remain parallel, and thus create a finished piece of uniform thickness.
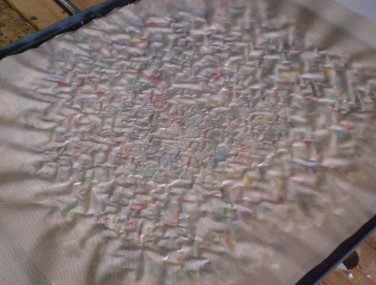 It took about ten minutes for the material to melt down - and this time, I just turned off the machine and let the plastic cool slowly inside it, constrained between the plates.
Even so, it still shrank noticeably - that's why the separator material has puckered in this picture.
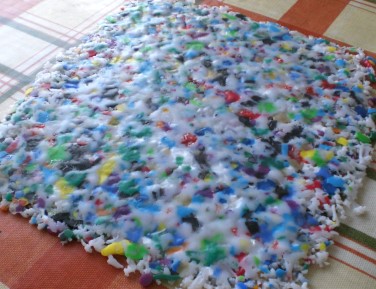 The fully cooled product is a slightly bumpy sheet of multicoloured solid plastic - frilly and incomplete at the edges, but I have a plan to overcome that.
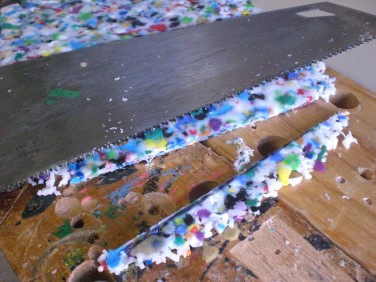 The plastic sheet is easy to cut neatly with an ordinary hand saw - and assuming I find a mechanised method of grinding the material, the trimmings would be re-usable.
The End Result
The finished product is a 4mm sheet of light, strong plastic - it's unbelievably tough - at least twice as rigid and strong as a similar thickness of plywood. During the first few hours after cooling, the plastic noticeably hardens and stiffens - this could be a useful property.
Assuming I can make enough of this, and successfully weld it together, this is going to be an excellent boatbuilding material. It can probably stand to be a little bit thinner.

What Next
I need to find a better way to process the raw materials - ideally to a finer texture, as some of the surface bumpiness in this second piece corresponds with the different original pieces of shredded HDPE (this is discernible because of the different colours).
Instead of using metal nuts to space the hotplates, and simply piling the raw materials onto the surface, I'm going to cut a rectangular hole in a flat piece of metal (of the appropriate thickness), then pile the shredded plastic into the hole - as long as I get the quantity of plastic right, this should be a quick way of creating tile-like pieces of plastic of uniform shape and size, that require minimal trimming.
I also need to experiment with welding pieces of this plastic edge to edge.
Further Experiments
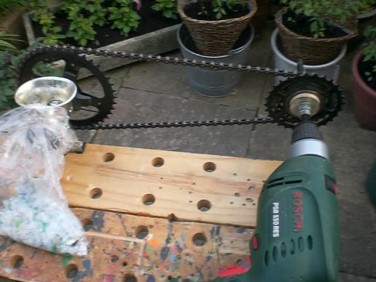 I decided to try to motorise the Spong mincer. My first attempt used the drive train components from a broken bicycle I bought for a fiver at the scrap yard, using a variable-speed electric drill as the motor
This didn't work well, for a number of reasons - it was just plain difficult to engineer everything to be rigid and aligned enough to keep working - so the chain would occasionally fly off - and the drill was labouring at times, stalling even, when a slightly tough piece of plastic went through the mincing blades.
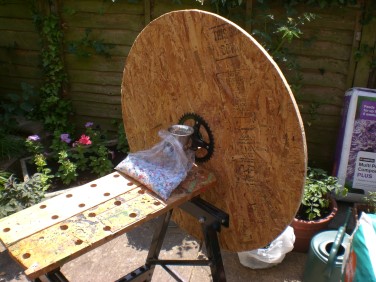 Another approach was needed. Part of the difficulty of operating the mincer using the short crank handle (and indeed the drill motor) was the potential to jam when the going got just a little tough.
So I made a 30-inch wooden flywheel out of OSB and attached this to the drive shaft (using the bicycle sprocket, as this happened to have four convenient mounting holes in it), with a bolt (about a third of the way out from the centre) to serve as a new crank handle...
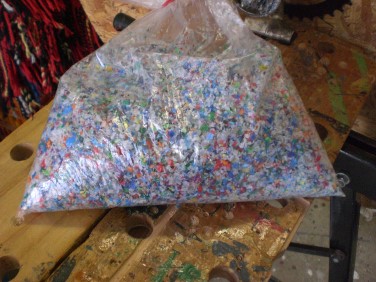 That worked pretty well - the wheel can be spun up to speed with one hand, whilst the other feeds bits of plastic into the top of the mincer.
It's still fairly hard work, but I was able to shred about a kilo of plastic in half an hour or so. That's enough throughput not to have to commit any further engineering to this problem.
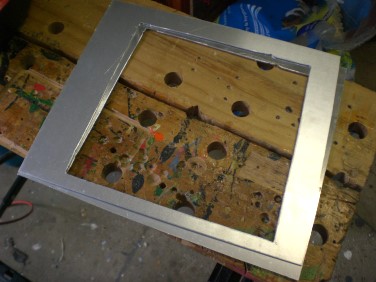 I wanted to make square panels with edges capable of being lapped for ease of welding together.
I reasoned that this should be possible by cutting two frames out of of 1.5mm thick aluminium sheet. The borders are deliberately unequal so that when one of the sheets is flipped over, the two holes will be diagonally offset, creating pairs of opposite lapped flanges on the edges of the moulded piece.
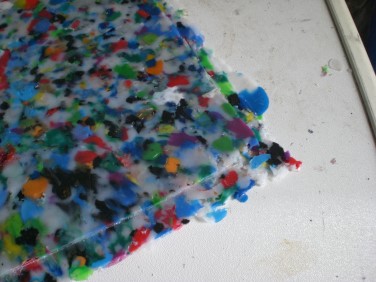 This was a partial success - the plastic melted and did (well, mostly) form a square sheet with flanges at each side which would lap with the mating ones at the other side.
But quality control is almost impossibly difficult with this method - and after only the second run, removing the plastic from the frame left it buckled - there's no way I'd be able to make dozens of panels this way.
I think the next thing to try will be to make panels the size of the whole platter then trim them to their exact final size and shape after cooling - If I do this with a router against a template, I can achieve a very consistent result, as well as recovering the shavings with a vacuum extractor - and they can be added back into the next melt.
Whole Platter Moulding
Well, this is more promising - I set a metal nut in each corner of the platter. I worked out the volume of the material needed based on the area of the platter multiplied by the thickness of the nut - then used this to calculate that I should need 310 grammes of HDPE to make the panel.
It seemed like too much plastic when I piled it up unmelted, but there's obviously a fair bit of inefficiency in the packing, as it compressed down to one third of its unmelted volume.
For this experiment, I used approximately half coarse and half fine ground material. The fine-ground stuff definitely packs and melts better, but there are still voids and porous areas.
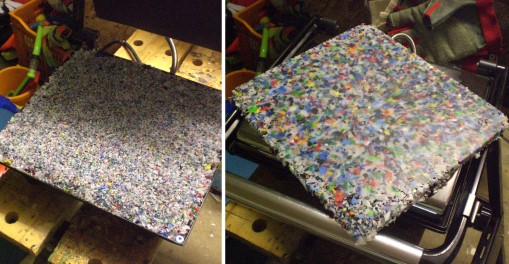
I need to sit and think on this for a week or so now. Clearly, the process isn't yet perfected and at present, there's no clear way to progress this production method toward the manufacture of a boat.
One promising possibility was mentioned to me by the teenage daughter of a friend - at the time, I didn't think it viable, but actually - it has promise...
The idea was to manufacture the panels continuously - that is, make one panel, then move it almost completely off the platter, and make the next one directly onto the edge of the first, and so on - thus producing a continuous strip of plastic.
The reason I first thought this non-viable was that the sandwich toaster I'm using has a slight raised edge all the way around the lower platter - but I could probably cut or file that off (OK, ruining the device in the process, but I'm prepared to write off this machine as a consumable in this project).
This might actually work - and might save me a great deal of trouble in welding panels together. The expansion coefficient of HDPE might make it a bit tricky though.
A Breakthrough
 This might not look like much - but it represents a breakthrough. It's yet another sample of HDPE remoulded sheet, but two things are different from previous experiments:
Only the coloured plastic was ground up - the white layer is made from milk bottles just cut into coarse flakes using scissors.
It was cooled off the sandwich press, between two flat boards, clamped tightly together.
The result is a very coherent, smooth, product that flexes without cracking or breaking. A slightly thicker version of this will do very nicely for making the boat.
This makes the continuous moulding process possible. I'll mould a section on the heated press, then quickly pull it out to the cold press, then reinsert the end of the cooled material and mould a new section on the end - and so on. I need to make it thicker than this, but this is another significant engineering hurdle out of the way - and I also don't have so much plastic grinding to do.
Production
 After amassing about 7 or 8 kilos of plastic in the form of bottle tops ground up into pieces and HDPE bottled cut into flakes with scissors, I decided it was time to try producing some sheet material in bulk.
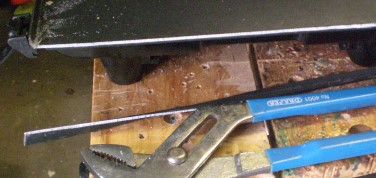
This entailed crossing a point of no return - I had to break the front lip off the lower plate of my sandwich toaster. This turned out to be pretty easy, as it's cast aluminium and once I'd cut neatly down the corners, attempting to bend the lip downwards actually resulted in it just tearing off.
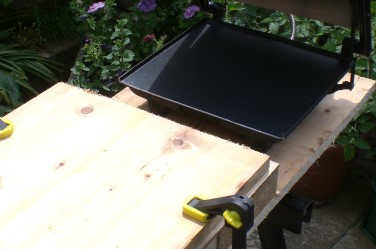 Next, I constructed a board on which to sit the toaster, with a cold press at exactly the same level as the lower hotplate.
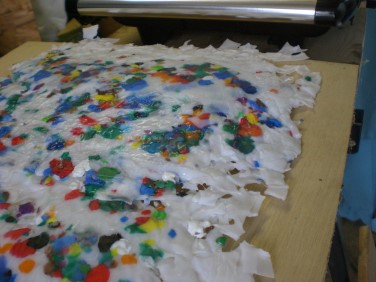 ...And on with production, except it was a disaster! - really uneven and inconsistently-melted plastic, with horrible ragged edges. No better than the very first experimental melt.
The reason for this is that the flakes of cut-up bottle are really slippery - and tend to spread out on the hotplate to an extent where parts then don't have enough plastic present to melt into a solid thickness.
So I went back to grinding up everything, including the milk bottle material (really hard work).
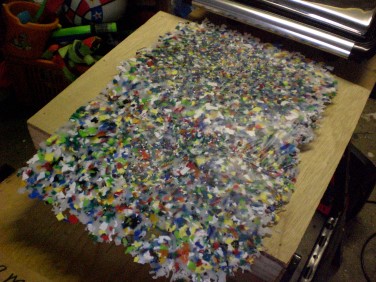 The result was better, but still too wavy and in places, porous to the extent that you can see through it. Not good enough.
A Different Approach
On reflection, I don't think it's going to be possible to mould a continuous sheet of material in this way - I had real trouble handling it in such a way as to avoid tearing off the hot edge that is just out of the press, or introducing distortion.
I'm going to try something else - a return, of sorts, to the original plan of tessellated tiles...
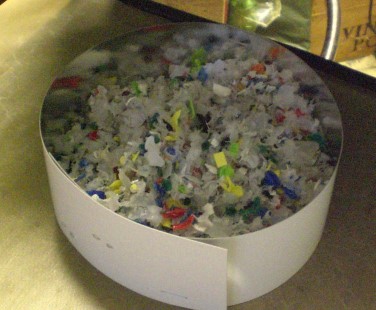 Rather than trying to calculate the exact amount of plastic required to make a given shape, I'm going to let the plastic decide for itself.
Starting with exactly 100g of shredded/ground plastic, I added it to the hotplate inside of a cardboard ring, to prevent it scattering.
I then removed the ring, added the top sheet of separation material and closed the press, allowing the plastic to melt and spread. A small nut at each corner of the press ensures that it closes evenly and to a specific thickness.
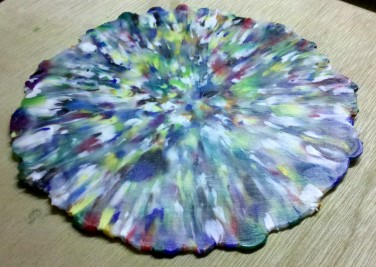 As the plastic melts and pressure is applied to the press, the material spreads only as long as the desired minimum thickness has not been reached - and because it's spreading, the leading edge is neat, not ragged.
There are other things to like about this sample of plastic too - the radial pattern on it indicates that the plastic has undergone shear, which will help to ensure a really good union between all the separate fragments. And apart from that, it just looks nice.
The New Plan
100g of plastic should always spread to this extent, given the same conditions - so I should be able to mass-produce these pretty plastic pancakes, then arrange them in a hexagonal packing grid and fill in the gaps with loose material, melted and pressed/welded into place with a hot clothes iron, then constrained in a flat press to cool. By this method, I should be able to construct a flat sheet any size and shape I want.
This does mean I have to grind all the source plastic - even the bottles, so I may need to have another go at motorising the grinder. First, I'll make another couple of pancakes and see if I really can join them together.
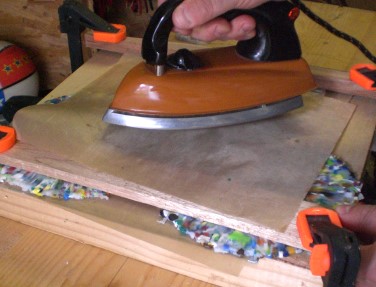 Welding the plastic pancakes together was fairly straighforward - just a case of clamping them in the right positions, piling some plastic granules into the gap, placing on a sheet of baking liner and ironing it all down with a non-steam iron on full heat.
Pressing down on the iron makes the additional material shear and bond to the edges of the pancakes, which also soften under the heat.
 As long as the whole thing is clamped and pressed flat while it cools, the result is a flat, strongly-joined sheet of plastic.
I need to develop a bit more finesse with the technique, but this will work fine.
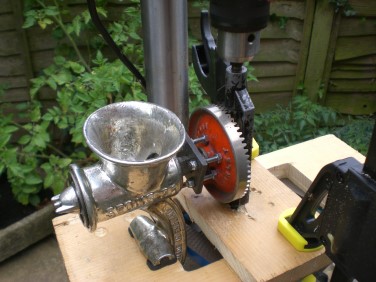 I also successfully motorised my grinder - using the gearing mechanism from an old Stanley hand drill - driven in reverse in the chuck of my pillar drill - and with a custom adaptor plate bolted in between to unite the large gear and the triangular drive shaft of the mincer.
This works well, although friction gets it hot in use, but it means I can now grind all of the plastic for my project without developing a freakishly muscular right arm.
Nextly
I need to continue collecting plastic - I had about half of the total amount I would need for the boat, but wasted a lot of this on recent experiments - but no matter - I have established a network of enthusiastic friends, family and colleagues who are collecting for me - it won't take very long to amass a sufficient supply of raw material.
I'll grind up the plastic as I go and start making a stockpile of plastic pancakes, then assembly can commence - the boat build will be documented on its own page.
Meanwhile
Here's an idea with potential - the circular remelted plastic pancakes can be pressed into interesting shapes whilst still hot. I tried pressing one between two cheap steel bowls.
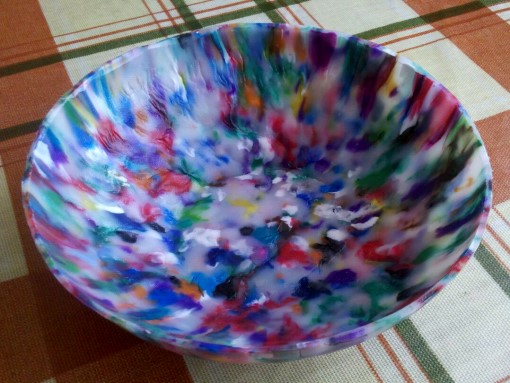
HDPE shrinks quite fiercely when it cools, so it fought me - trying to force the bowls apart, and the end result isn't as smooth or even as I'd like, but after a little trimming, it's undeniably a bowl.
A better result would probably be achieved by pressing between two wooden forms, as the insulating nature of the wood would permit the plastic to cool more slowly.
Something Really Ambitious
HDPE is such a tough, sturdy material when formed into solids thicker than the flimsy bottles and caps we normally encounter it as. I really want to make something big and durable out of this stuff, but how?
Rotational Moulding is the normal method of manufacturing large objects from HDPE - this consists of loading a quantity of plastic granules or powder inside a mould that is clamped shut, then rotated and rocked, whilst being heated from the outside. The plastic melts and sticks to the inside of the mould in (what should be) a uniform continuous layer. After slowly cooling, the mould is unclamped from the outside of the plastic piece, which may then require trimming and further finishing.
This approach is used for very large items such as canoes - and whist I'd love to be able to do that, it's a huge industrial process that is never going to happen in my garage.
So alternatives must be sought - and that's what this page is starting to look at...
Fumes
Surprisingly, HDPE doesn't emit noxious fumes, as long as the temperature doesn't greatly exceed its melting point. I've noticed some smoke and fumes when I've overcooked it in welding trials, but it seems that the sandwich press I'm using here has a top temperature that is exactly in the right range to melt the material without burning it.
Materials Required
Basing my calculations on the assumption that I'll make a small skiff or canoe based on something like a one-sheet ply boat plan...
The 'breakthrough' material I made (bottom left) is 2.2mm thick and almost strong enough to consider using as boat skin as is. Double that thickness will be plenty good enough (this material is stronger, tougher and more flexible than the equivalent thickness of marine ply).
So, the volume of a standard sheet, 4.4mm thick would be about 13,000 cubic centimetres. HDPE is about 0.95g per cubic cm, so that's about 12.35 kg of plastic.
Allowing for waste, extra parts etc, let's call that 15kg. A milk bottle weighs in at about 30g - so I need about 500 of them (interestingly, this was exactly what I guessed in the first place).
That's a lot of plastic - but at least I'm only having to shred the bottle tops now - the bottles themselves will just be cut into pieces with scissors.
Welding Trials
 Fortunately, my experimentation in producing sheet material has left me with plenty of samples for trial welding. At the moment, the approach that seems to work is to tack the two pieces to a batten (or if this was a boat build, a chine log), then using a fine nozzle on my hot air gun, apply heat to the gap at the same time as pressing a stick of plastic into it.
The end of the stick softens and melts, laying down into the gap as it goes.
I had better results still when I cut a much thinner welding rod out of my 2mm experimental sheet, then followed over with a hot clothes iron through a piece of silicone baking paper.
 The resulting weld isn't quite as strong as I'd like, especially on the inside of the corner, but I think practice will improve that. In any case, I intend to build and leave the chine battens in place, so they will greatly contribute to joint strength - the weld mostly just has to be watertight.
Gearing Up For Boat Build
 With the help of rallied friends and family, plus a very helpful and enthusiastic team at the staff restaurant at work, I'm collecting a truly huge number of HDPE milk bottles and caps.
I'm chopping these up as I go, to keep the task manageable and keep the bulk down.
Boat Design Ideas
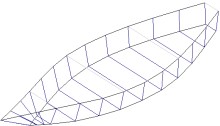 At the time of writing, the notion is to build a small canoe or kayak. Something broad with a flat bottom for maximum stability and ease of construction. Short and beamy - probably only 10 or 11 feet long and 30 inches across at the widest beam.
It won't be fast, but this isn't a race anyway.
Naming
I've had several ideas and suggestions for names for my recycled plastic boat, including:
"90% Recycled" - which might be true (the boat will contain some new materials - timber and fixings), but it's not very interesting...
"Post Consumer" - Actually, I quite like that.
"Bottly" (or "Bottle-y") - (the boat will be built and launched in Botley, where I live - and it's made of bottles)
"Speckled Jim" - A Blackadder reference - but also alluding to the speckled appearance of the recylcled plastic output.
